
 Welcome to the Blackboard Mailbag, where we feature a commonly asked question that has been hitting our mailbox recently: blackboard@fordham.edu. You’ll find an archive of all of the previous questions and answers on our fordham.edu/blackboard website.
Note: Features may change with future updates.
How can I email students or take attendance in one section of a merged course? And is there a way to view that specific roster in Blackboard?
Answer:
If you teach multiple sections and would like to eliminate the duplication of effort in creating content, assignments, etc. by having your courses merged into a Parent section, you can request a course merge by filling out our Course Merge form.
When courses are merged all of your students will be enrolled in the Parent course shell where you will be able to manage content. You will no longer be able to edit the Children courses.
Note, in order for us to merge your courses you will need to confirm the following:
- If you’ve done any work in these courses, it will not automatically transfer over to the merged course.
- If you have already created content in one of the courses and you would like to have it in the Parent course (merged course), please provide the course ID of that course or the five-digit CRN, and we can complete a course copy for you.
- Once the courses are merged, you will no longer go into the separate course shells. You will add and manage content within the Parent course and your students will automatically get the content within their registered course.
Announcements and Emails for individual sections using Qwickly
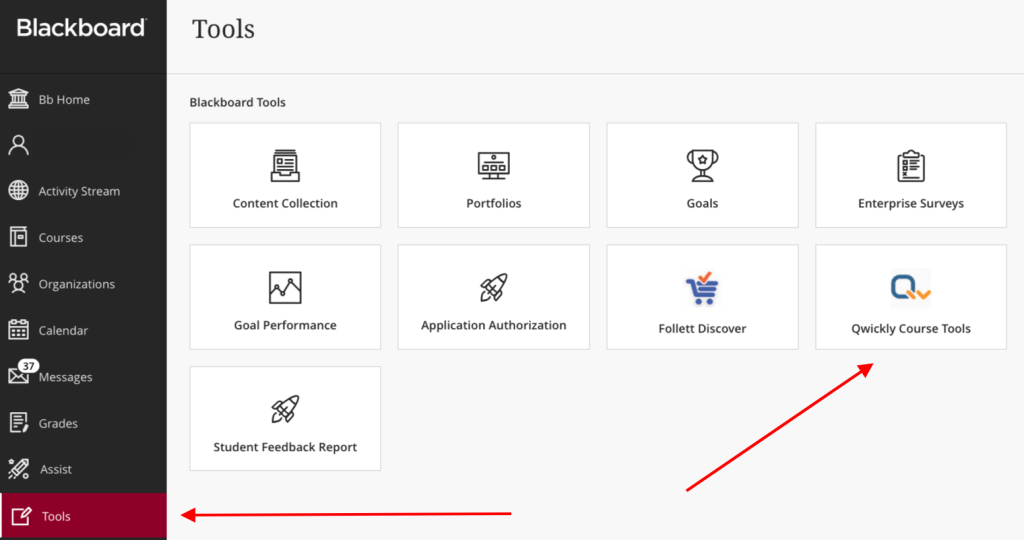
You can use the Qwickly tool for announcements/emails to specific sections. You’ll be able to access it by going to the Tool section from the base navigation of Blackboard.
Using Qwickly to take attendance by section
If you want to take attendance by section, you can do this by creating groups and adding the Qwickly attendance tool to your content stream.
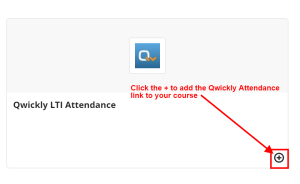
Once your groups are set up, add Qwickly to your content stream: click on the purple (+) and choose Tools/Content Market.

Scroll down and click on the (+) on the Qwickly card.
When you are ready, click into the link on your page, and set up your attendance preferences. In the settings area, once the desired Student grouping option is selected, the settings need to be saved.
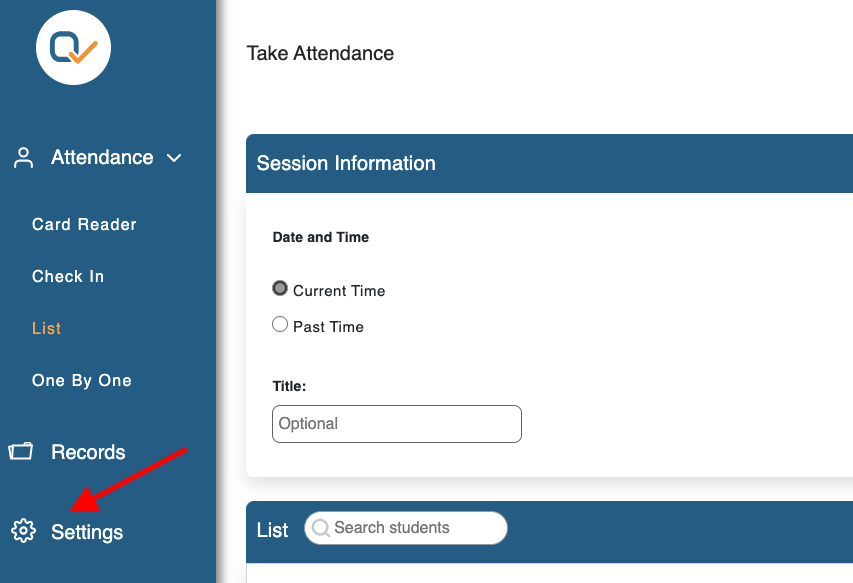
Back in the “Take Attendance” screen, there will be a new drop-down for the groups you set up. The desired group/section for which Attendance needs to be taken can be selected. This will change the roster and only show users who are part of the selected grouping and take Attendance just for them.
NOTE: If taking Attendance by Check-In mode or Card Reader mode, only one group/section can run at a time!
If you plan on using the self check-in feature, please be sure to show the link to your students as they will need to click into the tool when they are documenting their attendance.

Check In
If you opt to use student check-in, you can decide to require:
- A 4-digit pin your students must enter when checking in.
- A time limit. Choose a number of minutes to allow students to check-in. You can always end the check-in period early. Students will have X minutes to check in before the check-in period will automatically close.
**The timer closes the attendance window- and automatically submits the students as Absent after that period of time.
There are a few methods to take attendance with a check-in:
Option 1: Set the check-in to have no timer, and at a decided period of time manually close the attendance to students to mark unanswered students Absent.
Option 2: Set up the attendance for Check-in, with a timer, then edit the Attendance Record after class to mark individual students late. The attendance record can be edited at any time by going to “Attendance Record” clicking on the student’s attendance and changing their status and clicking save.
Using the Gradebook to Filter Students by Section
To see the various students in the different sections, you can do so by going to the Gradebook. Once at least one column is added to the Gradebook, you can use the Filter to toggle between the various sections. Click into the Grid format:

Using the Gradebook to Download an Excel File
Or, you can download the gradebook to work offline and it will list the students by their child enrollment. In the downloaded Excel Sheet you’ll see a column that lists the Child Course ID.

Note: you also have access to the individual course rosters on the Faculty Dashboard. To access your class list, go to www.fordham.edu and click on the Faculty Page to access the dashboard.
For additional FAQs and resources about Blackboard, visit fordham.edu/blackboard, attend one of our workshops, or reach out to us with your availability and we will accommodate small groups and one-on-one sessions.
Have feedback or suggestions on features? Blackboard’s parent company Anthology hosts The Idea Exchange. This is a place specifically for Blackboard to track and manage enhancement requests. It allows for things like upvoting ideas and sharing development plans and statuses. You will need to create an account to access the Idea Exchange.